

저는 UI 디자인뿐만 아니라 문서 작업도 피그마로 하고 있어요. 피그마에서 문서 작업할 때, 유용하게 사용할 수 있는 플러그인을 추천드려요.
피그마로 문서 작업 시 장점
- 설치 없이 웹에서 문서 작성 가능
- 오토 레이아웃 및 컴포넌트를 이용한 문서 템플릿 사용
- 문서 공유 및 협업의 편리함
- 문서 버전별 관리
- 다양한 플러그인 사용
목차
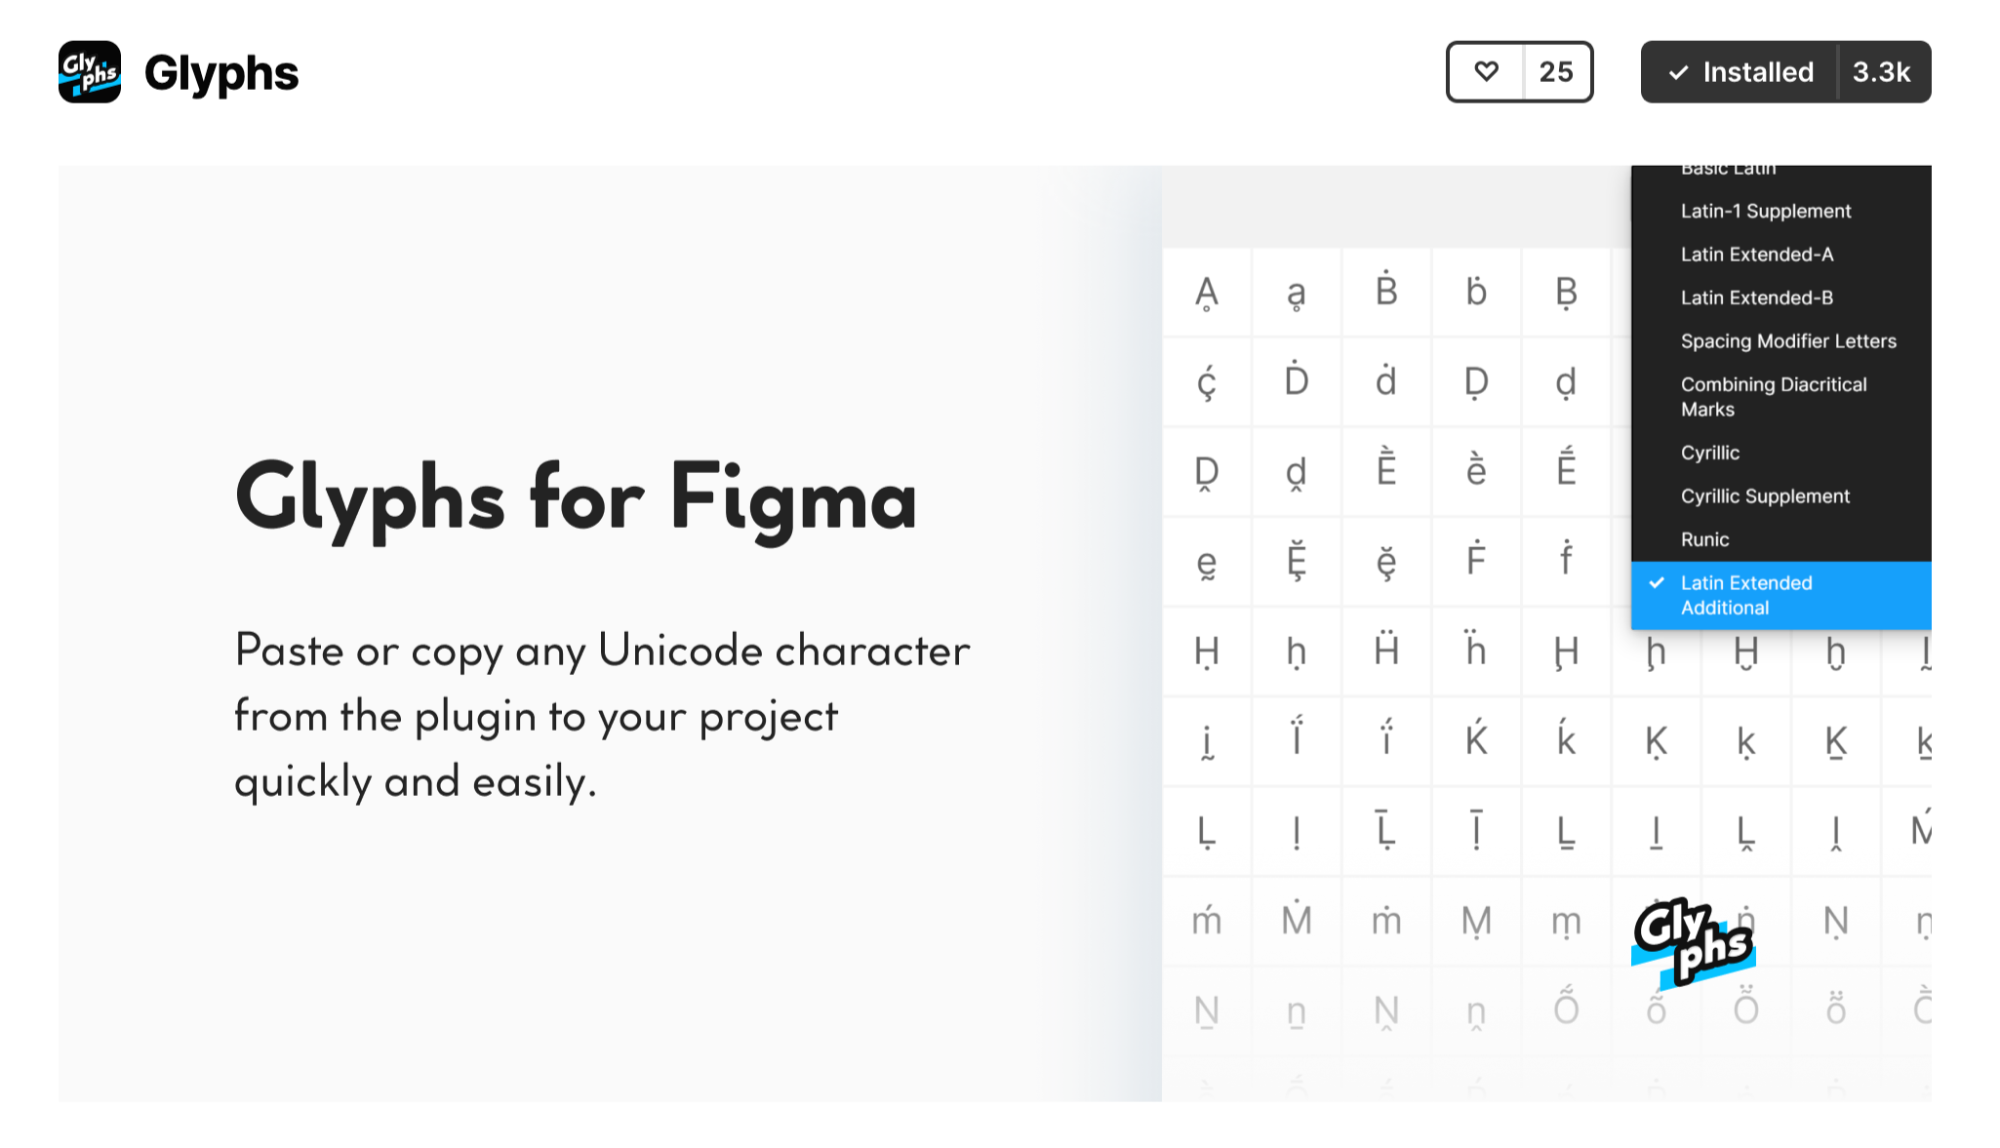
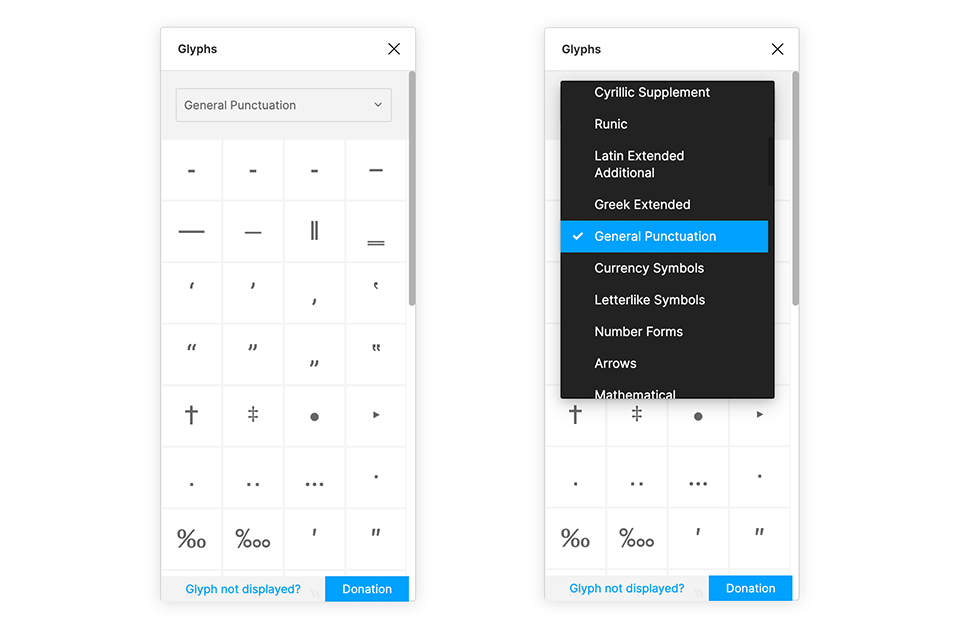
01. Glyphs
소개 : 이름 그대로 글리프 플러그인으로 문서 작성 시, 필요한 특수 문자를 바로 찾아서 사용할 수 있습니다.
활용 방법 : 문서를 작성 시 대분류, 소분류 등 문단을 구분할 때 활용하기 좋습니다.
링크 : www.figma.com/community/plugin/849323869157549525/Glyphs
Figma - Glyphs | Discover the wonderful world of glyphs, ligatures, and other characters with the Glyphs plug...
Figma Community plugin — Discover the wonderful world of glyphs, ligatures, and other characters with the Glyphs plugin. The plugin currently includes 50 Unicode Blocks. How to use • Left-click on a glyph to paste. or • Right-click on a glyph to
www.figma.com
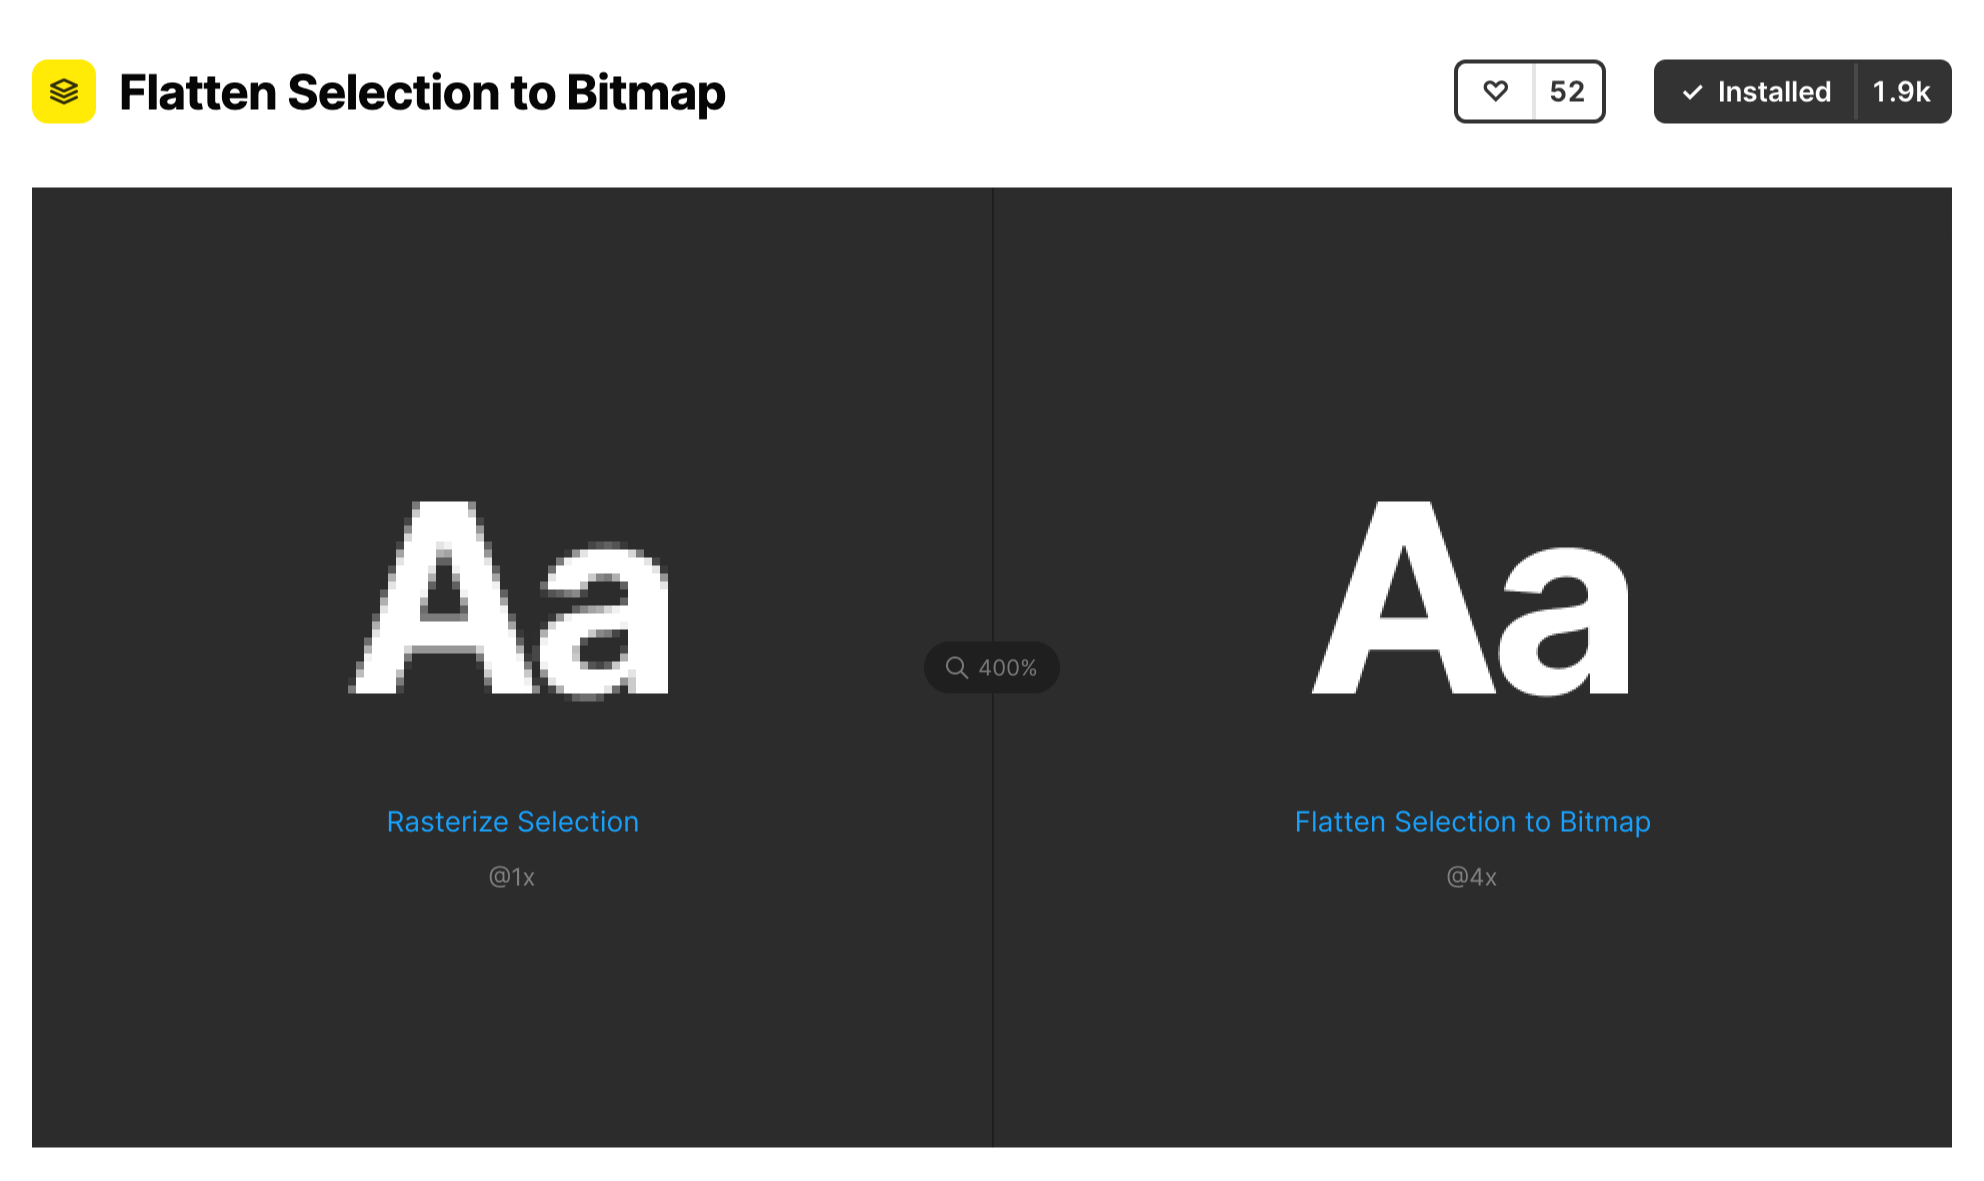
02. Flatten Selection to Bitmap
소개 : 피그마에서 벡터 기반으로 작업한 UI 및 이미지를 래스터화(Rasterize) 시키는 플러그인입니다.(벡터 -> 비트맵)
활용 방법 : 이 플러그인을 이용하면 벡터 기반의 이미지를 래스터화 시켜 다양한 문서 사이즈에 다양한 사이즈로 넣기가 편리합니다.
링크 : www.figma.com/community/plugin/837846252158418235/Flatten-Selection-to-Bitmap
Figma - Flatten Selection to Bitmap | Rasterize the selected layers at a high resolution (2x, 3x, 4x, 8x, or 10x). (This is to w
Figma Community plugin — Rasterize the selected layers at a high resolution (2x, 3x, 4x, 8x, or 10x). (This is to work around a limitation in Figma where layers can only be rasterized at 1x resolution.) If layers in the selection contain strokes or effec
www.figma.com
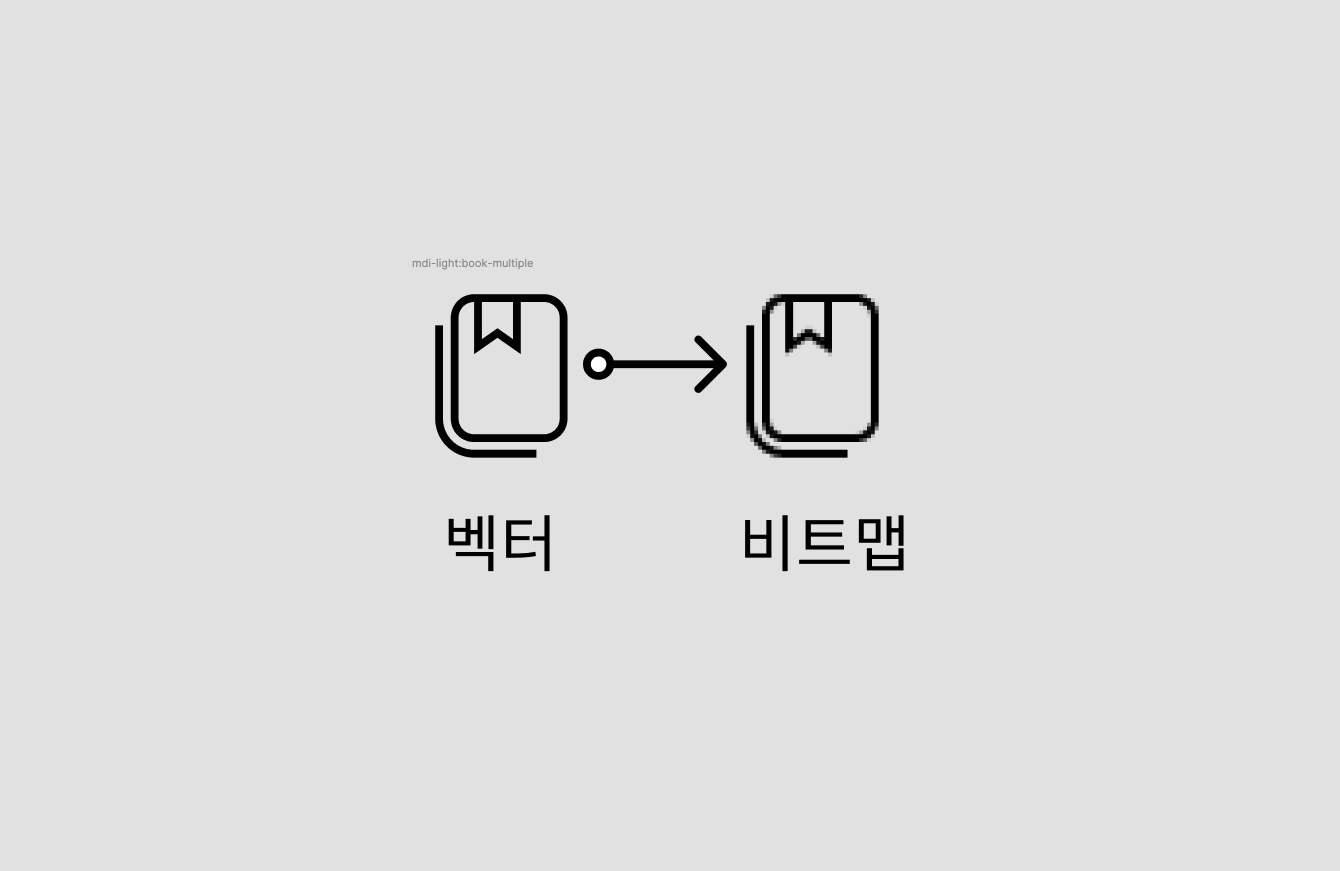
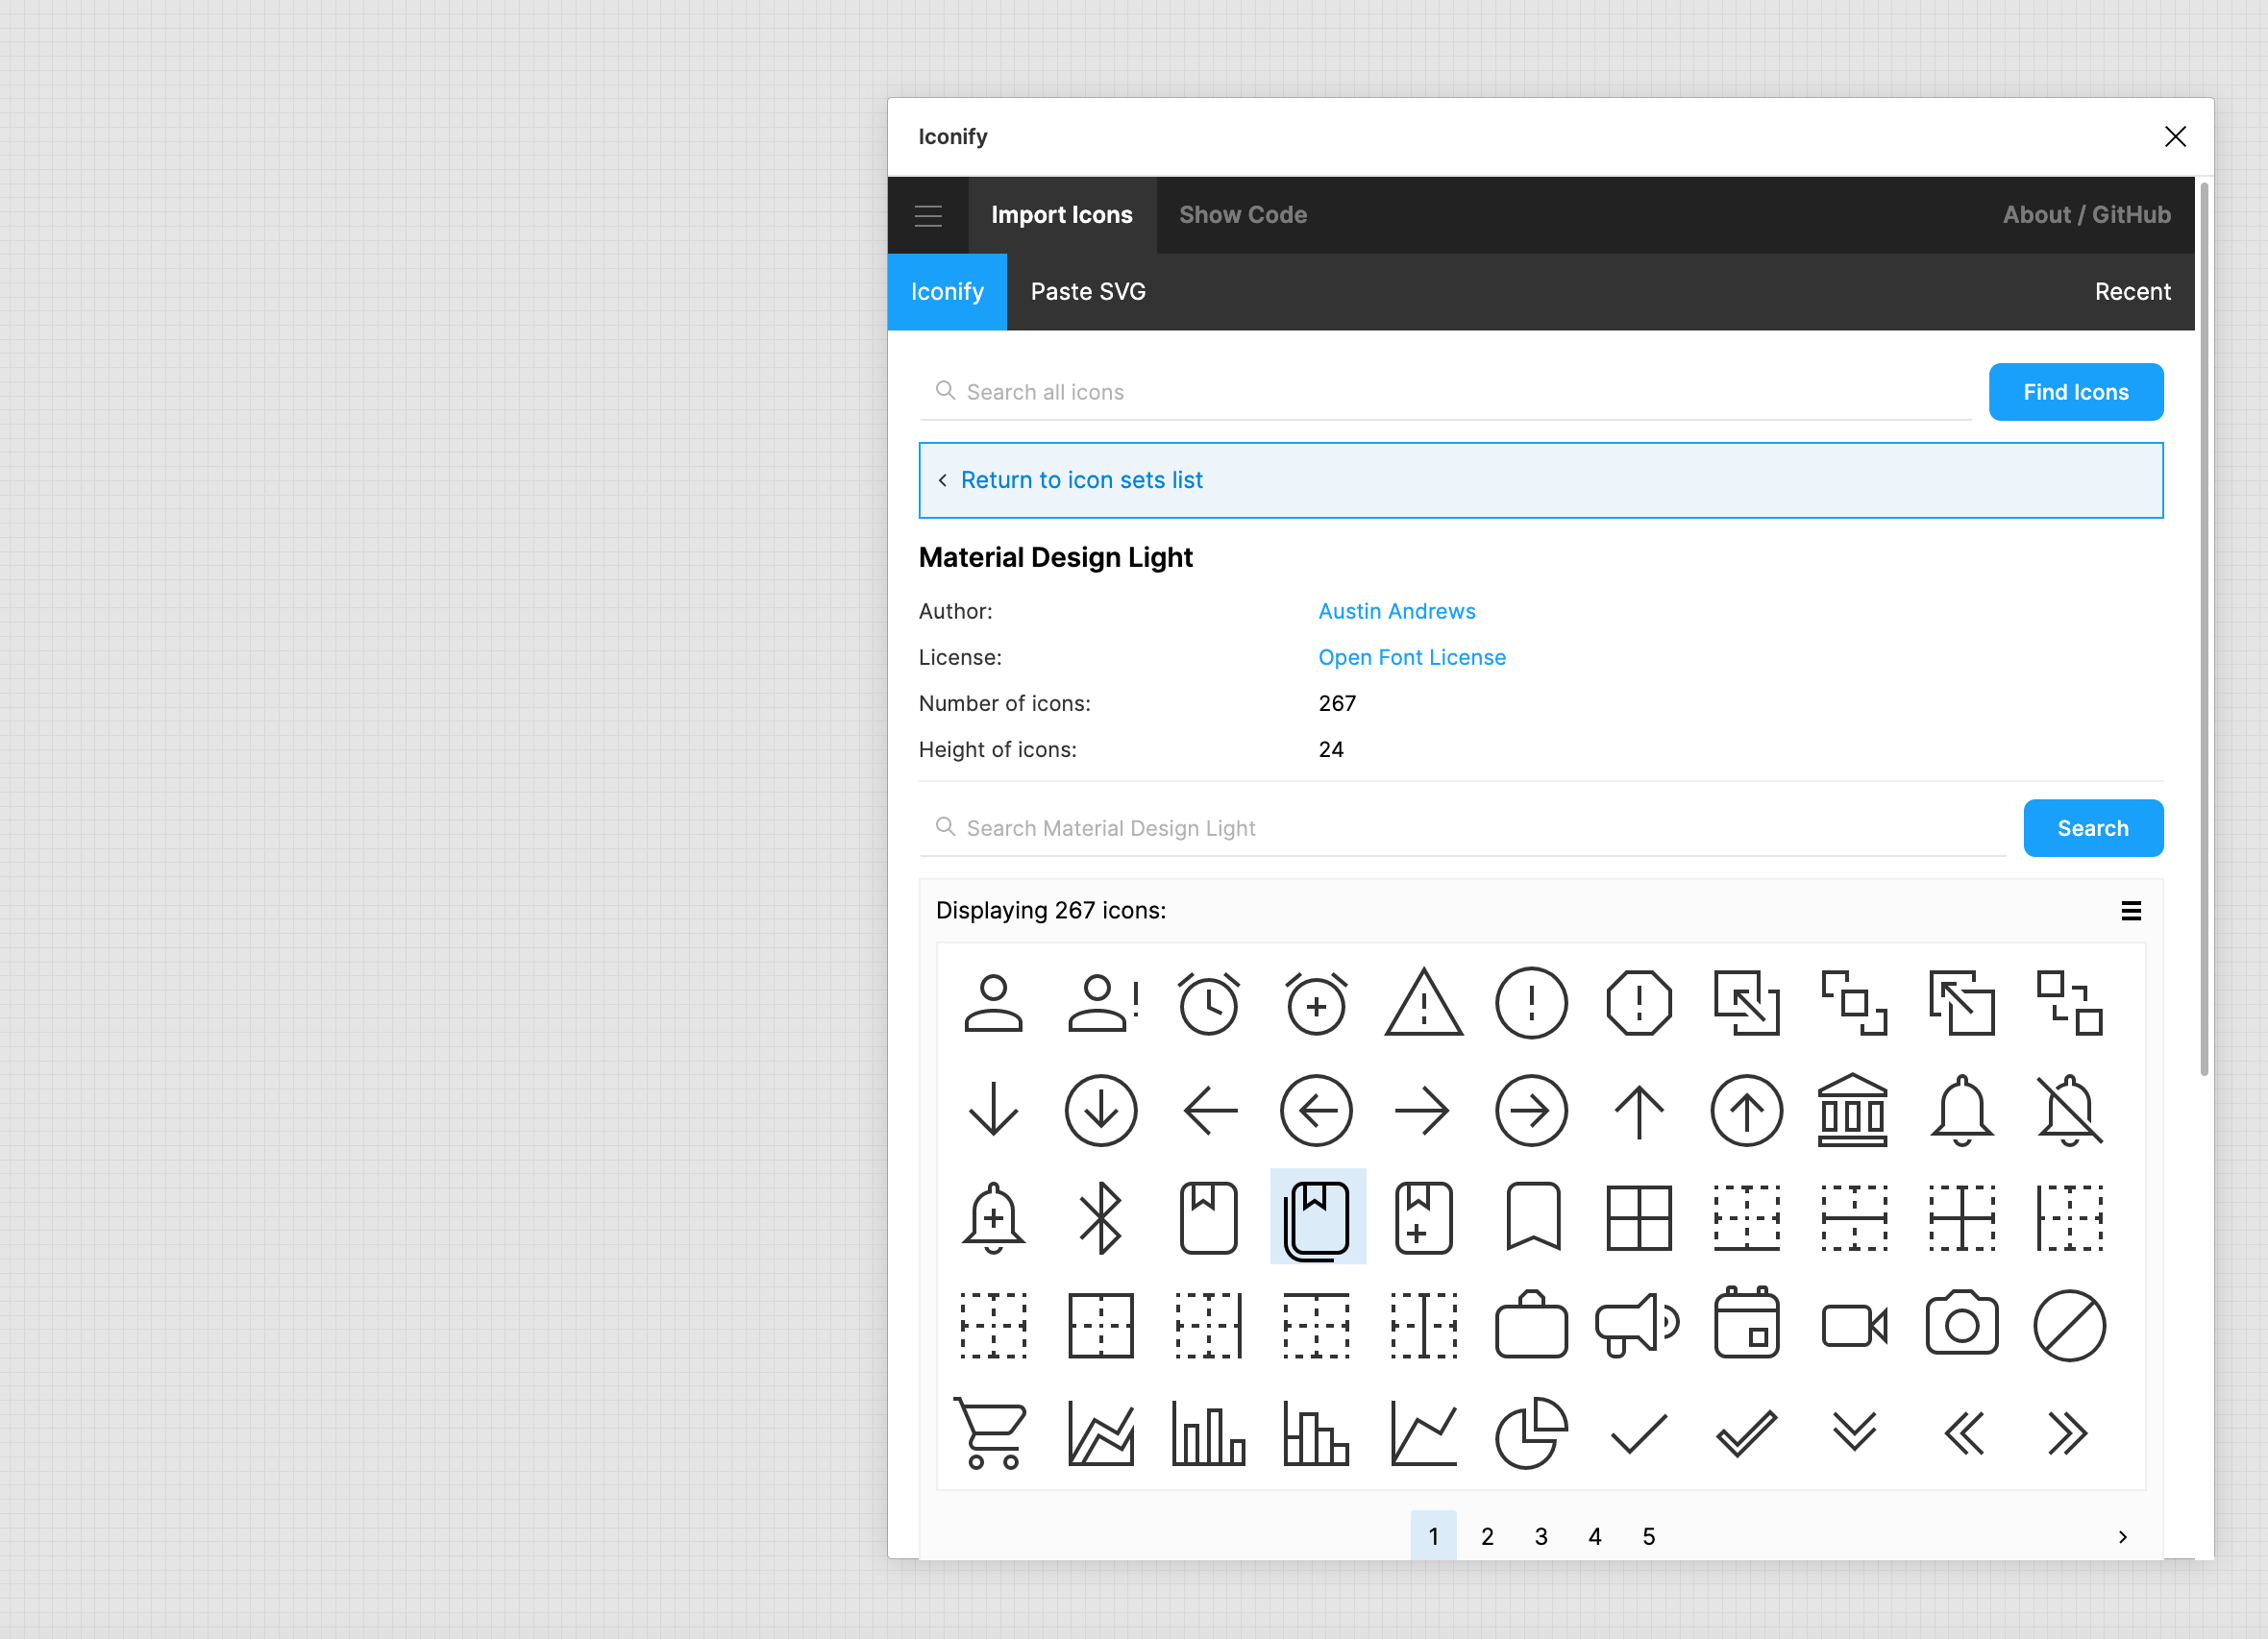
03. Iconify
소개 : 벡터 기반의 다양한 Icon(Material Design Icon 등)을 사용할 수 있습니다.
활용 방법 : 와이어프레임을 설계하거나 문서에 아이콘을 넣을 때 편리합니다.
링크 : www.figma.com/community/plugin/735098390272716381/Iconify
Figma - Iconify | Import Material Design Icons, FontAwesome, Jam Icons, EmojiOne, Twitter Emoji and many other icon...
Figma Community plugin — Import Material Design Icons, FontAwesome, Jam Icons, EmojiOne, Twitter Emoji and many other icons (more than 60 icon sets containing over 50,000 icons) to Figma document as vector shapes.
www.figma.com

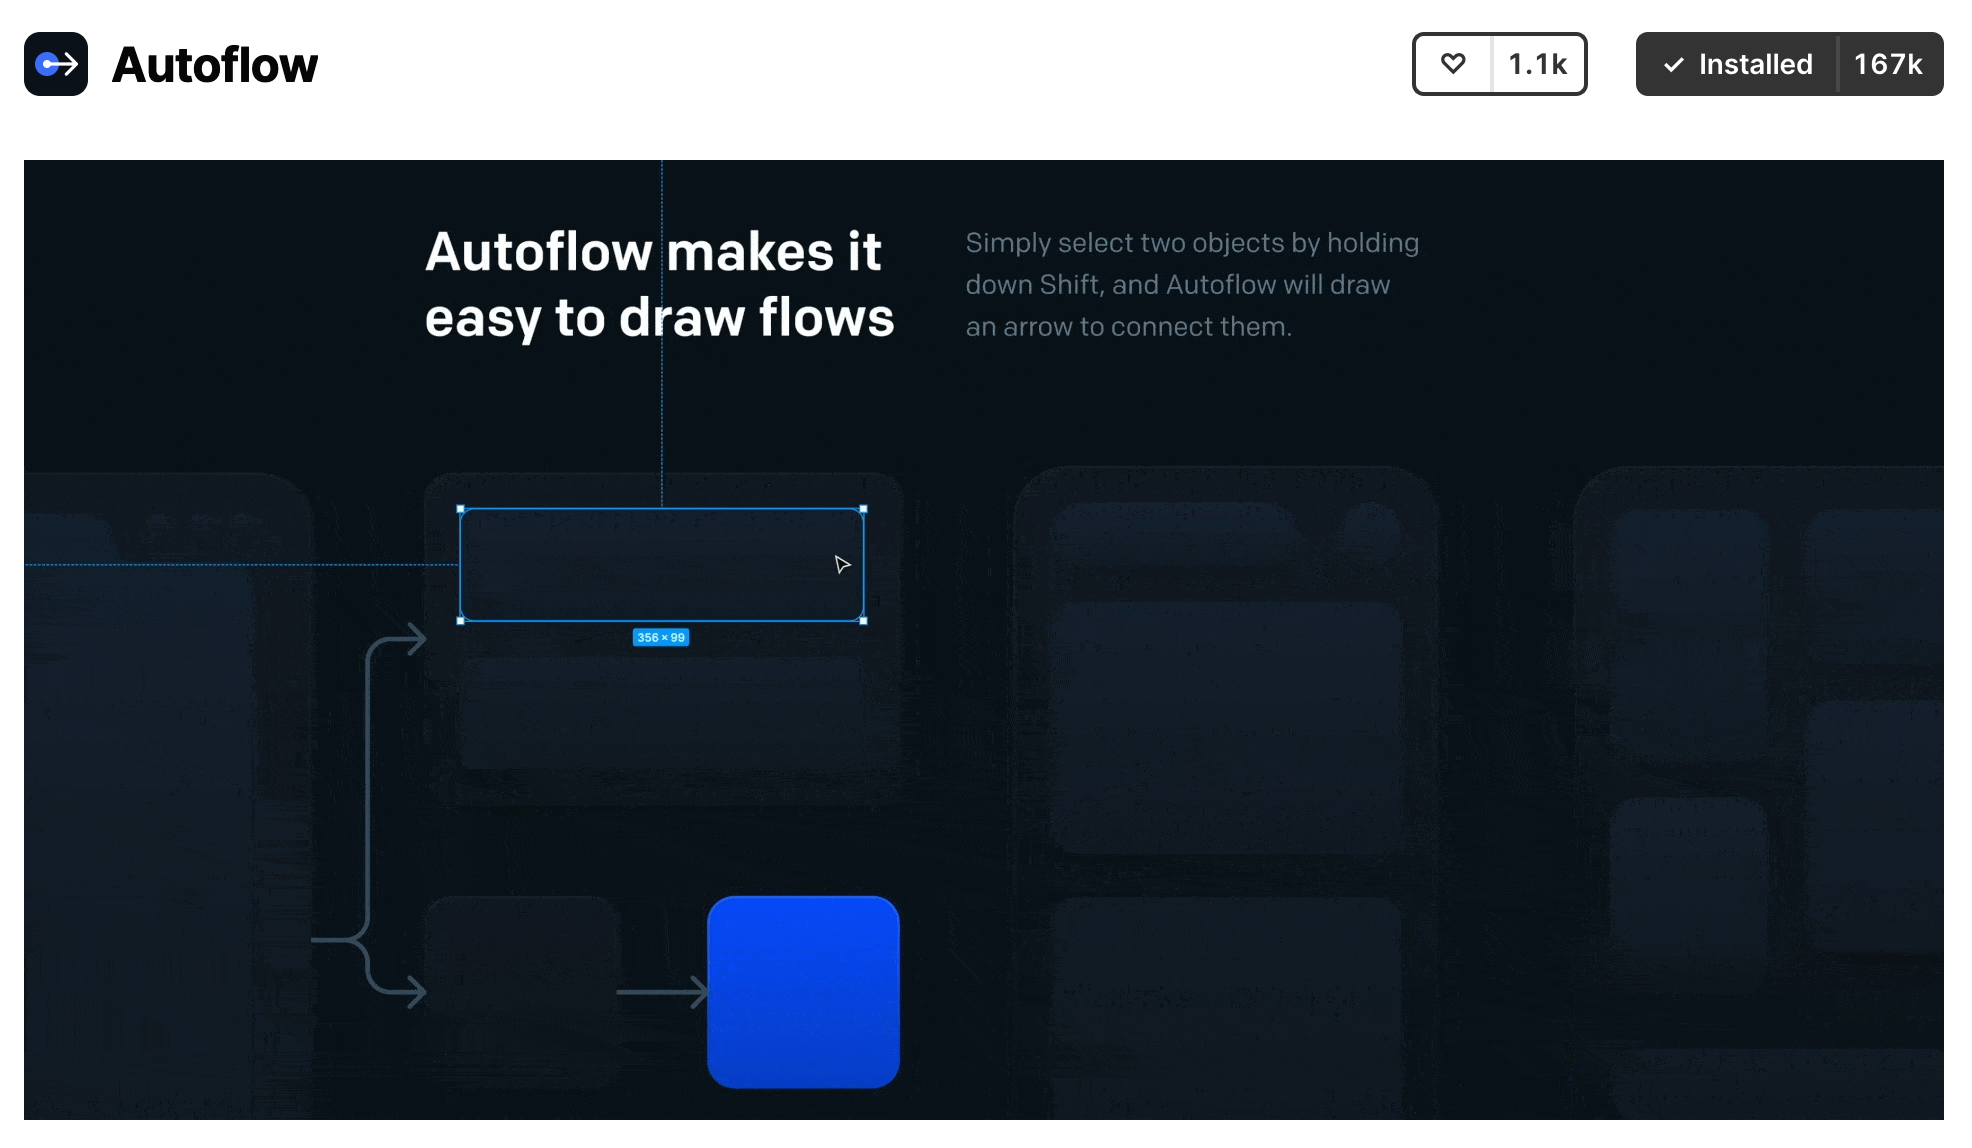
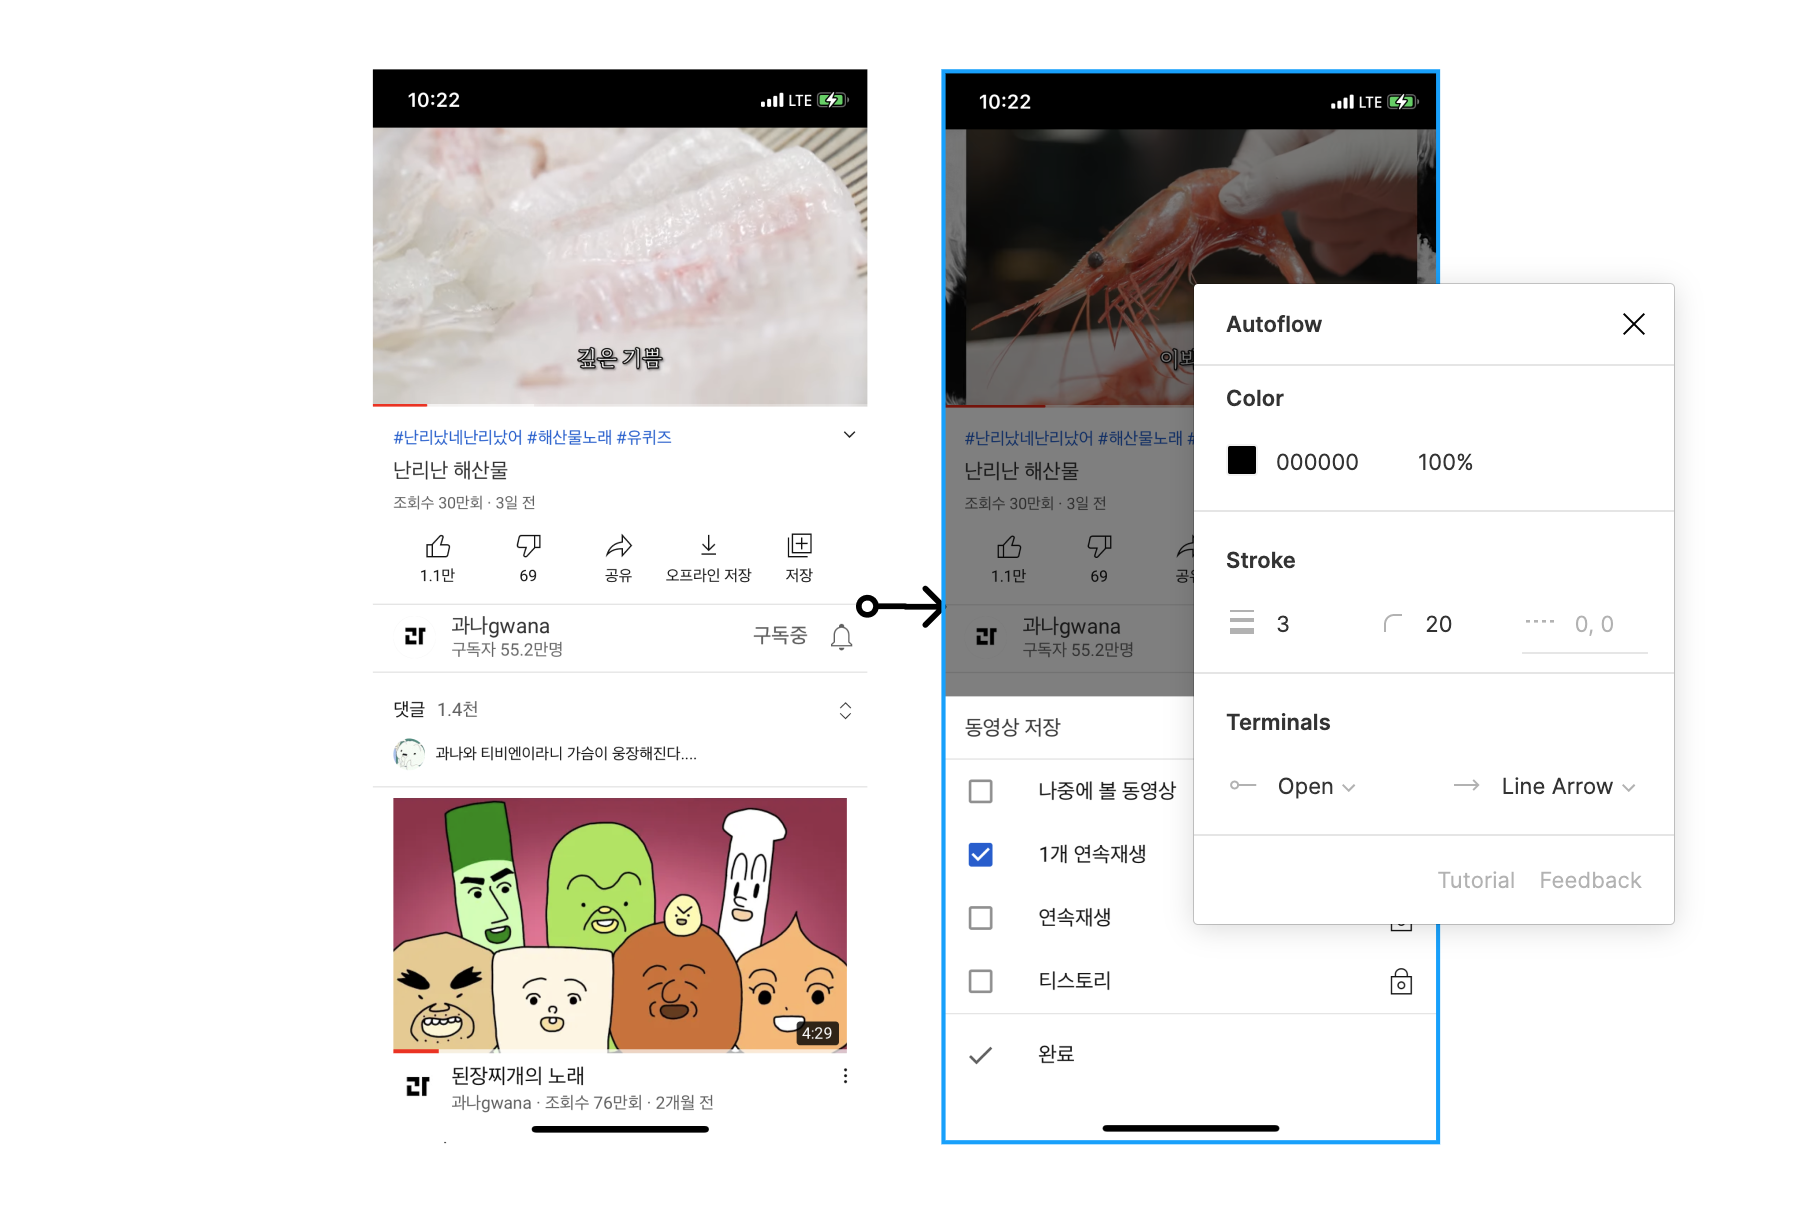
04. Autoflow
소개 : 선택한 오브젝트끼리 자동으로 연결시켜 주는 화살표를 만들어 줍니다.
활용 방법 : 플로우 차트(Flowchat) 및 프로세스를 그릴 때 편리합니다.
링크 : www.figma.com/community/plugin/733902567457592893/Autoflow
Figma - Autoflow | Autoflow makes it easy to draw flows. Simply select 2 objects and a line will be magically drawn ...
Figma Community plugin — Autoflow makes it easy to draw flows. Simply select 2 objects and a line will be magically drawn between them. Run AutoflowSelect any 2 shapes whille holding down ⇧SHIFT and a line will be drawnKeep selecting until you're all w
www.figma.com
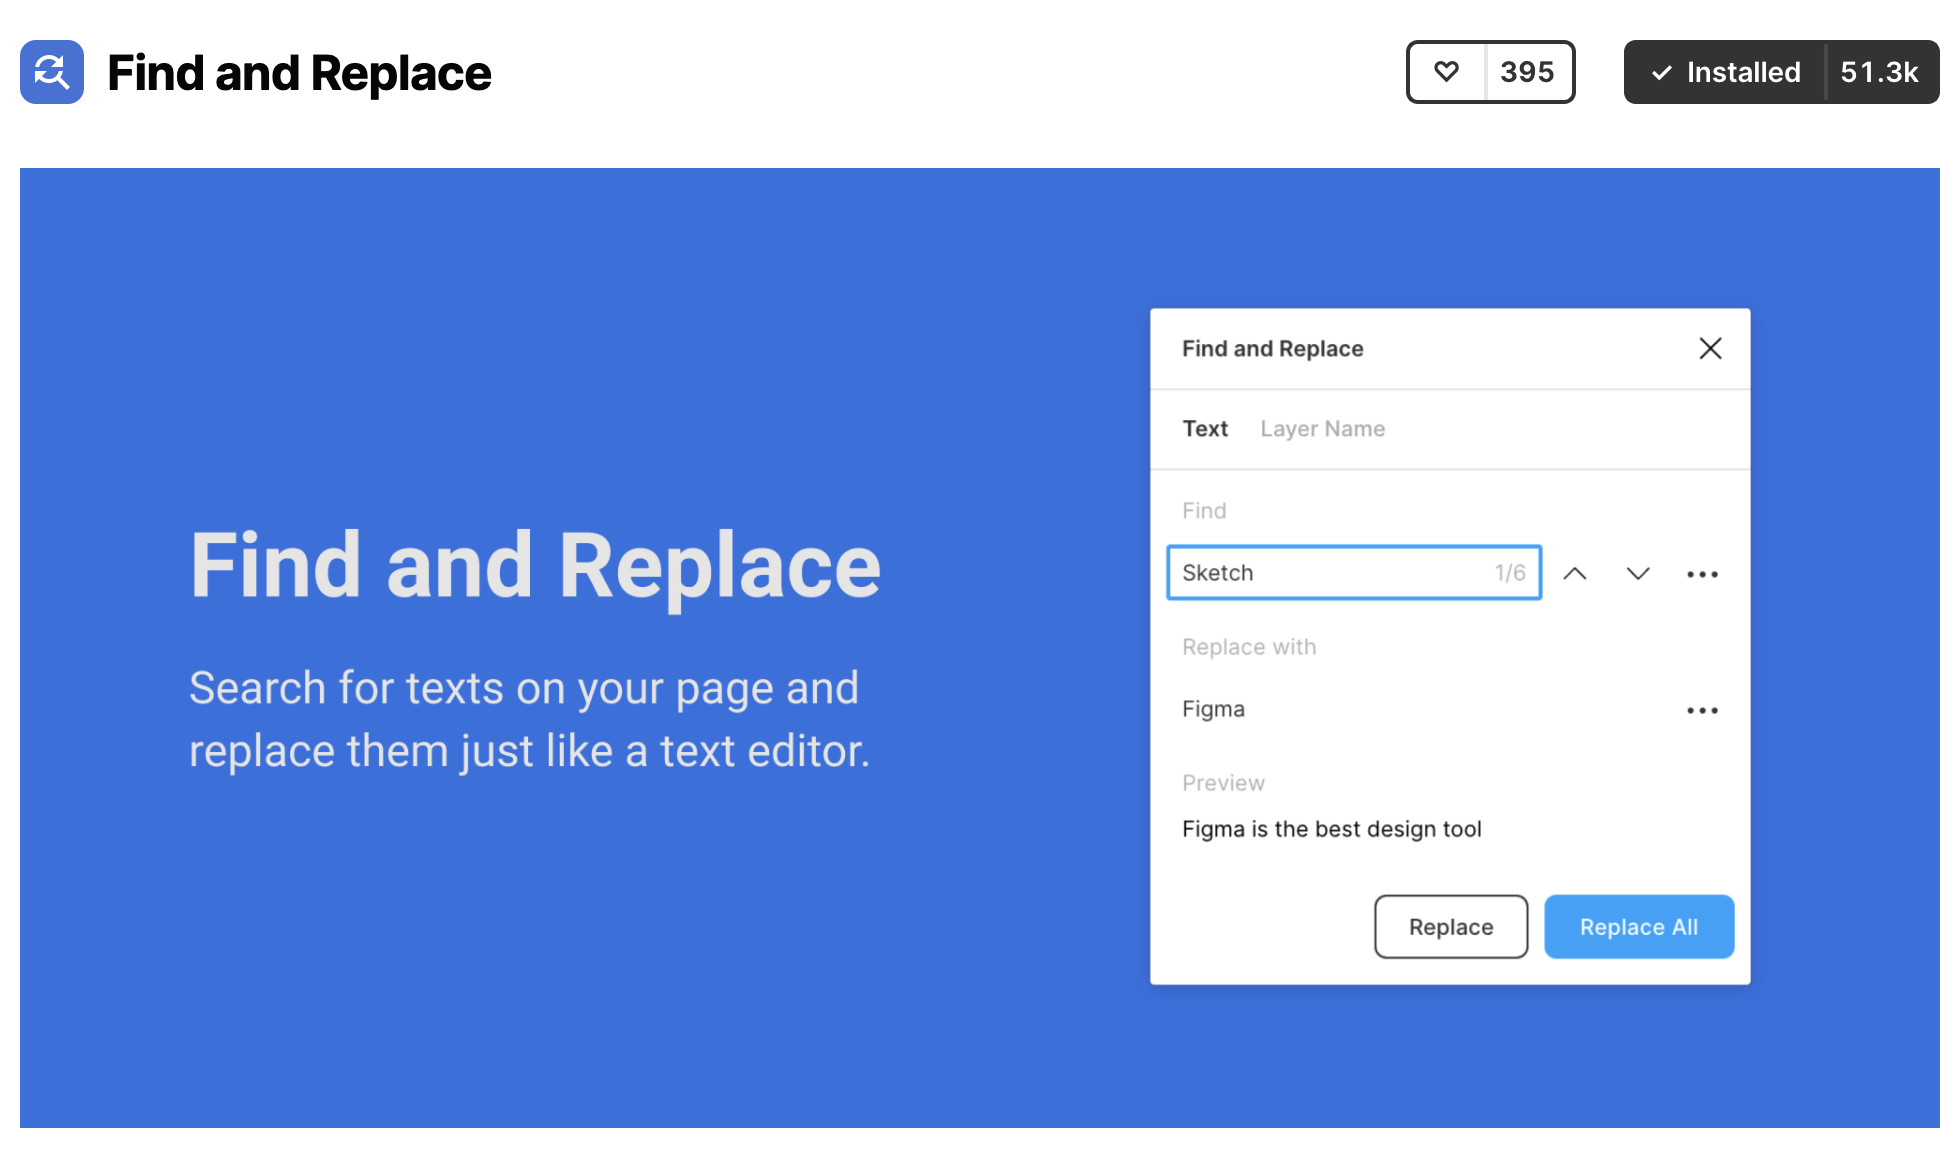
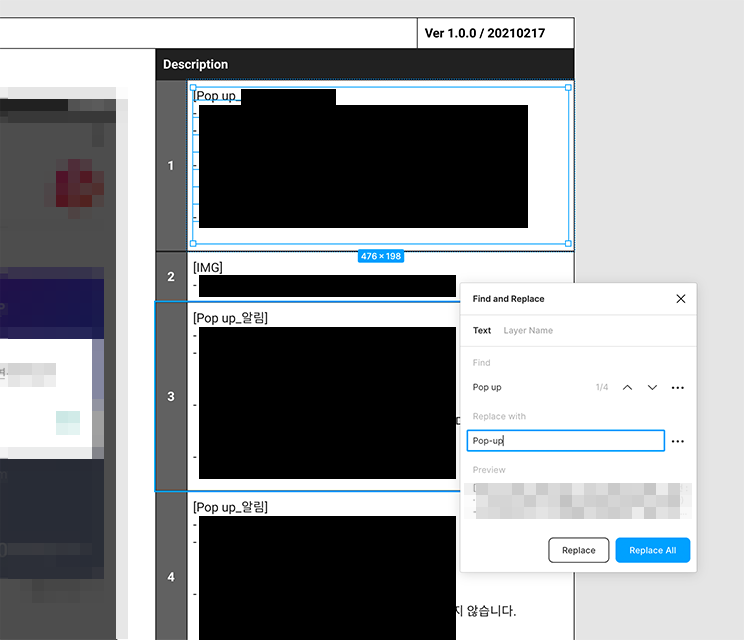
05. Find and Replace
소개 : 웹의 Ctrl + F의 기능처럼 작성한 문서 안에 텍스트를 찾아주고 해당 텍스트의 부분적으로 또는 전체적으로 변경할 수 있습니다.
활용 방법 : 문서안에 많이 사용된 용어(날짜, 버전, 특정 용어 등)를 한 번에 변경할 수 있어서 편리합니다.
링크 : www.figma.com/community/plugin/735072959812183643/Find-and-Replace
Figma - Find and Replace | Search for texts on your page and replace them just like a text editor. You can search for objec...
Figma Community plugin — Search for texts on your page and replace them just like a text editor. You can search for objects on your page by either text content or layer name. Click on the ... button next to each section to display more settings. ——
www.figma.com
2022.01.04 - [디자인/피그마(Figma)] - [피그마] 단축키 추천 & 팁
[피그마] 단축키 추천 & 팁
피그마로 UI 디자인 작업할 때, 유용하게 사용했던 단축키 및 팁을 소개해드릴게요. 목차 01. 피그마 전체 단축키 확인 디자인 툴의 단축키는 대부분 비슷한 것 같아요. 직접 확인하면서 본인의
wdesigner.tistory.com
2021.02.05 - [디자인/피그마(Figma)] - [피그마]Auto layout(오토레이아웃)으로 Underline Tab(언더라인 탭) 만들기
[피그마]Auto layout(오토레이아웃)으로 Underline Tab(언더라인 탭) 만들기
UI 작업을 하다 보면 Underline이 들어간 Tab을 만들게 되는데요. Tab에 들어가는 텍스트(탭명) 길이가 제각각이기 때문에 새로운 것을 만들 때마다 Underline 길이를 조절해야 하는 번거로움이 있어요.
wdesigner.tistory.com


